Getting Started with Dublyo
Deploy your first app in under 5 minutes. Dublyo gives you the simplicity of a managed platform with the power of your own cloud server — no DevOps experience needed.
Sign up with GitHub
One-click login, no forms to fill out
Add credits
Top up via PayPal — $1 = 100 credits
Create a server
Pick a provider, region, and size — ready in 3 minutes
Deploy an app
Choose from 100+ templates or connect your GitHub repo
Access your app
Get a free .dublyo.co domain with automatic HTTPS
Step 1: Sign Up with GitHub
Go to dublyo.com and click Sign in with GitHub. That's it — no email, no password, no verification steps. Your GitHub account is your Dublyo account.
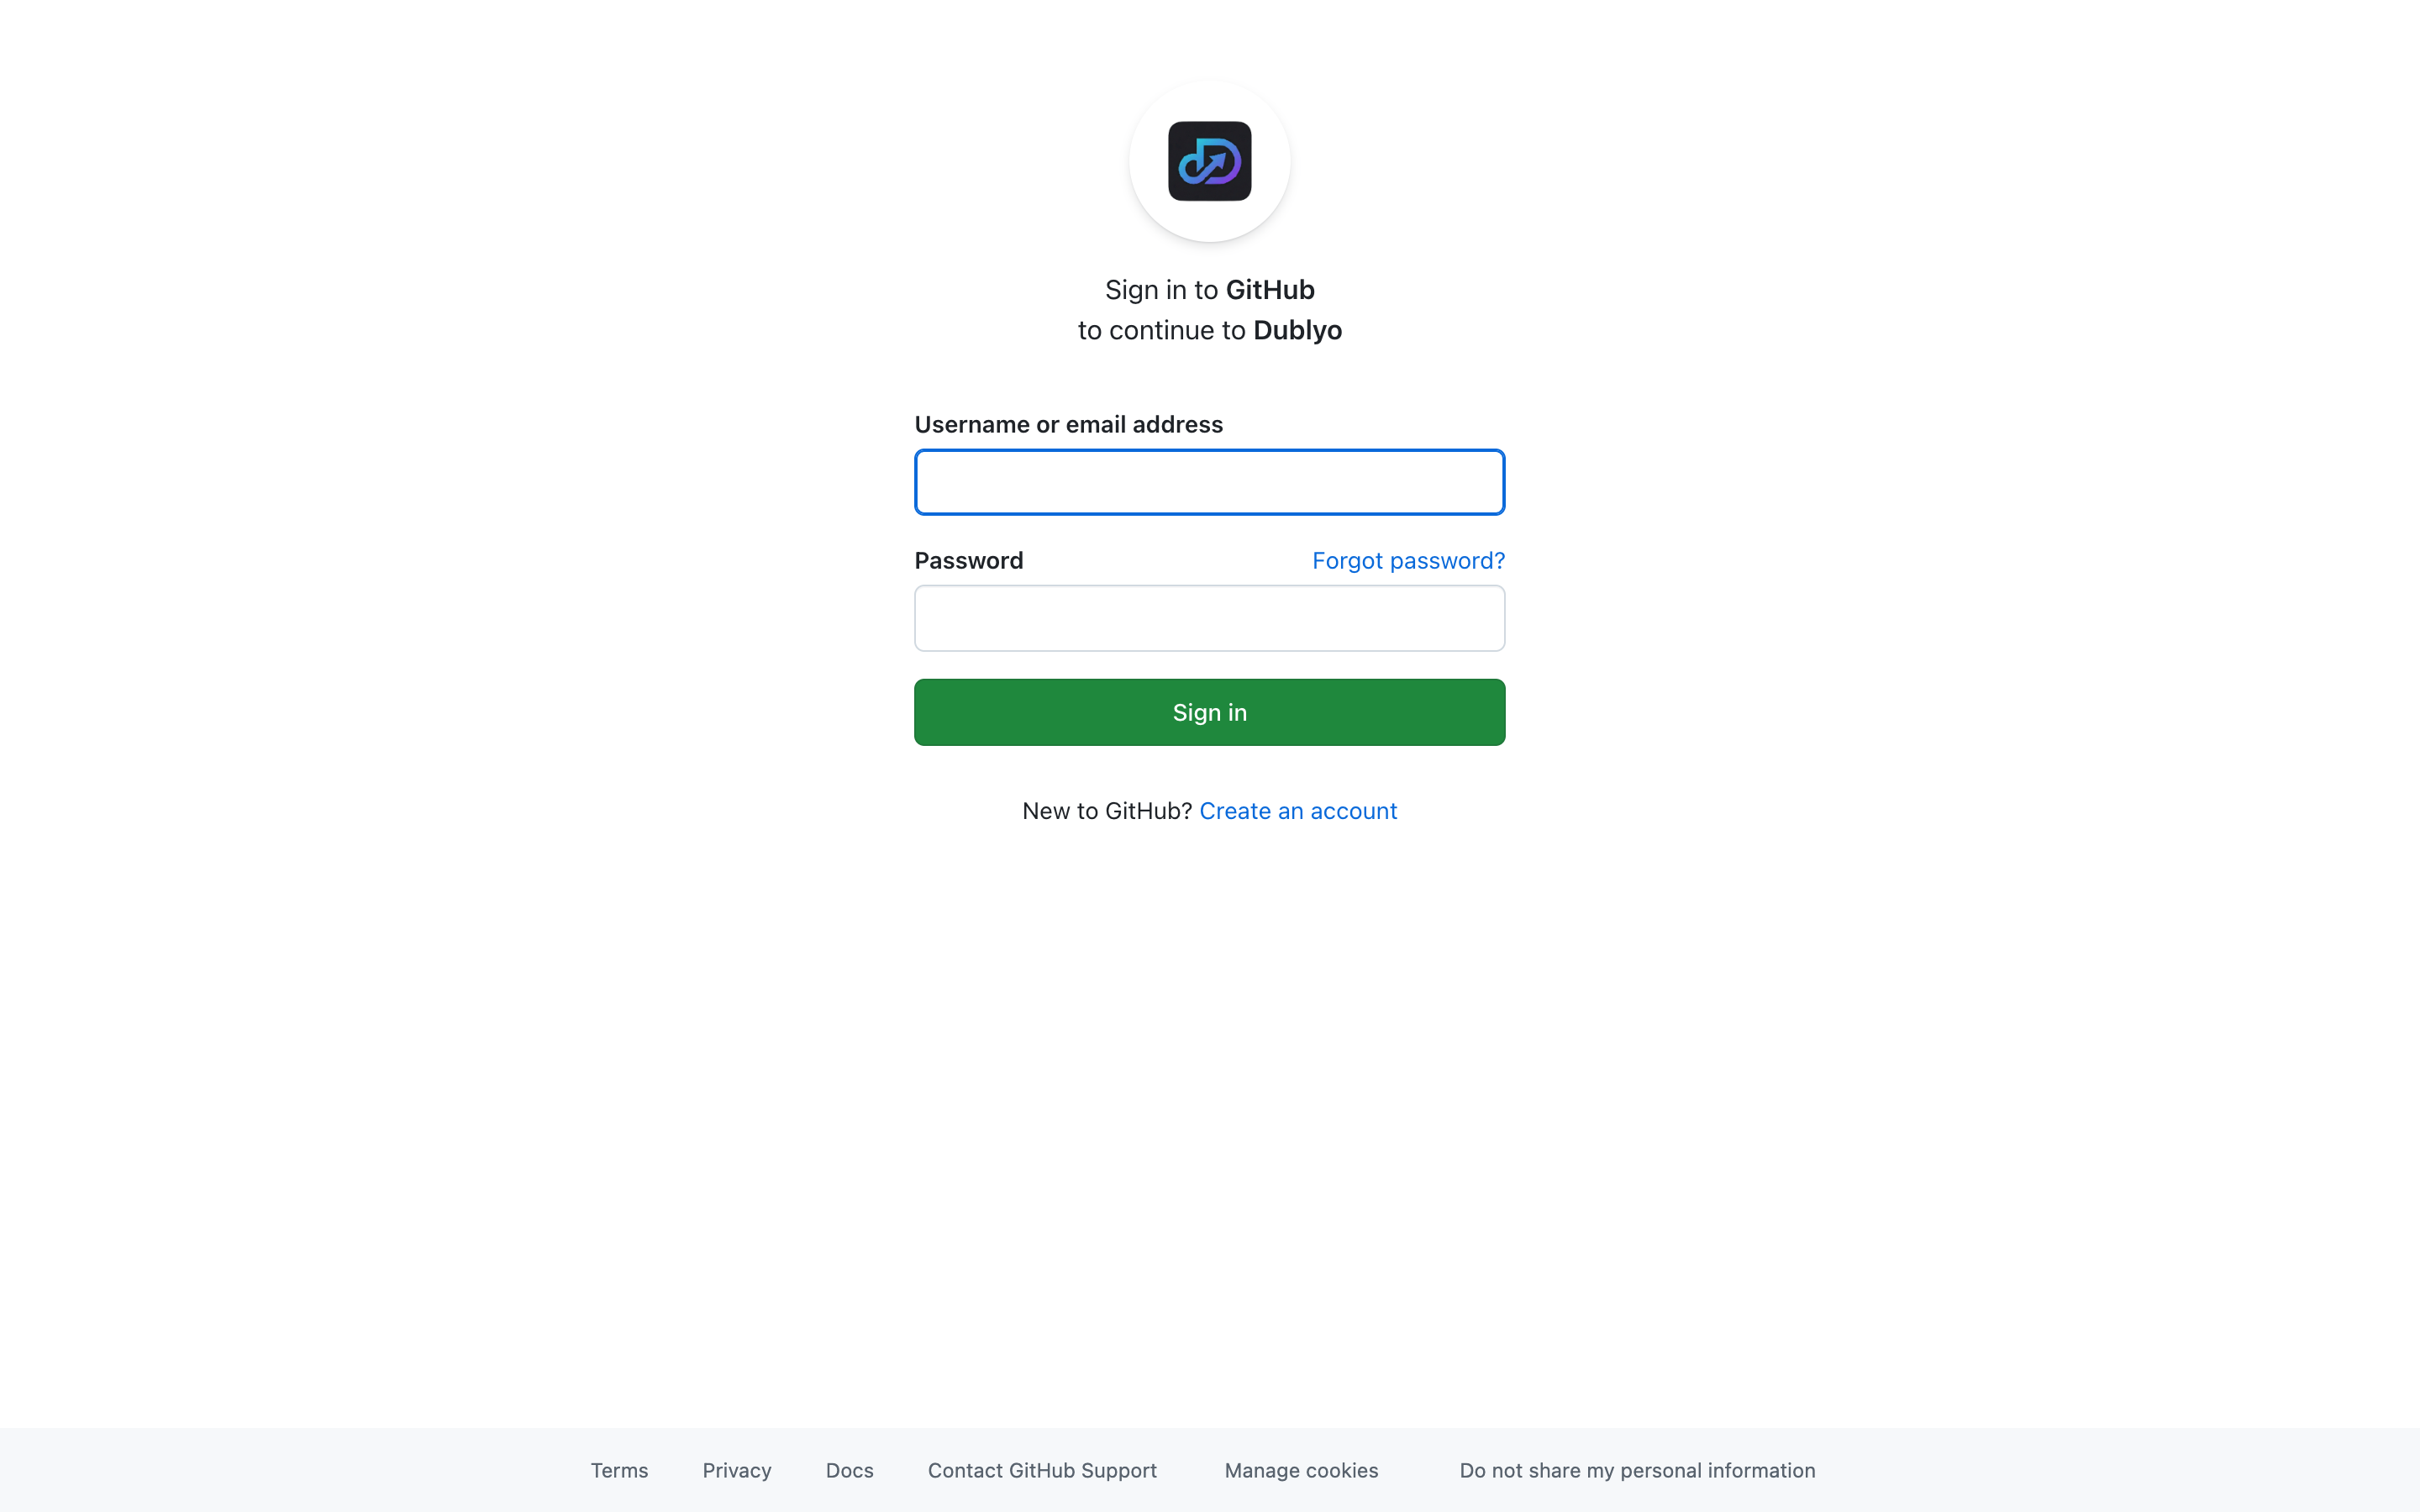 Click "Sign in with GitHub" to get started
After authorizing, you'll land on your dashboard. If you're new, you'll see an onboarding checklist that walks you through your first setup.
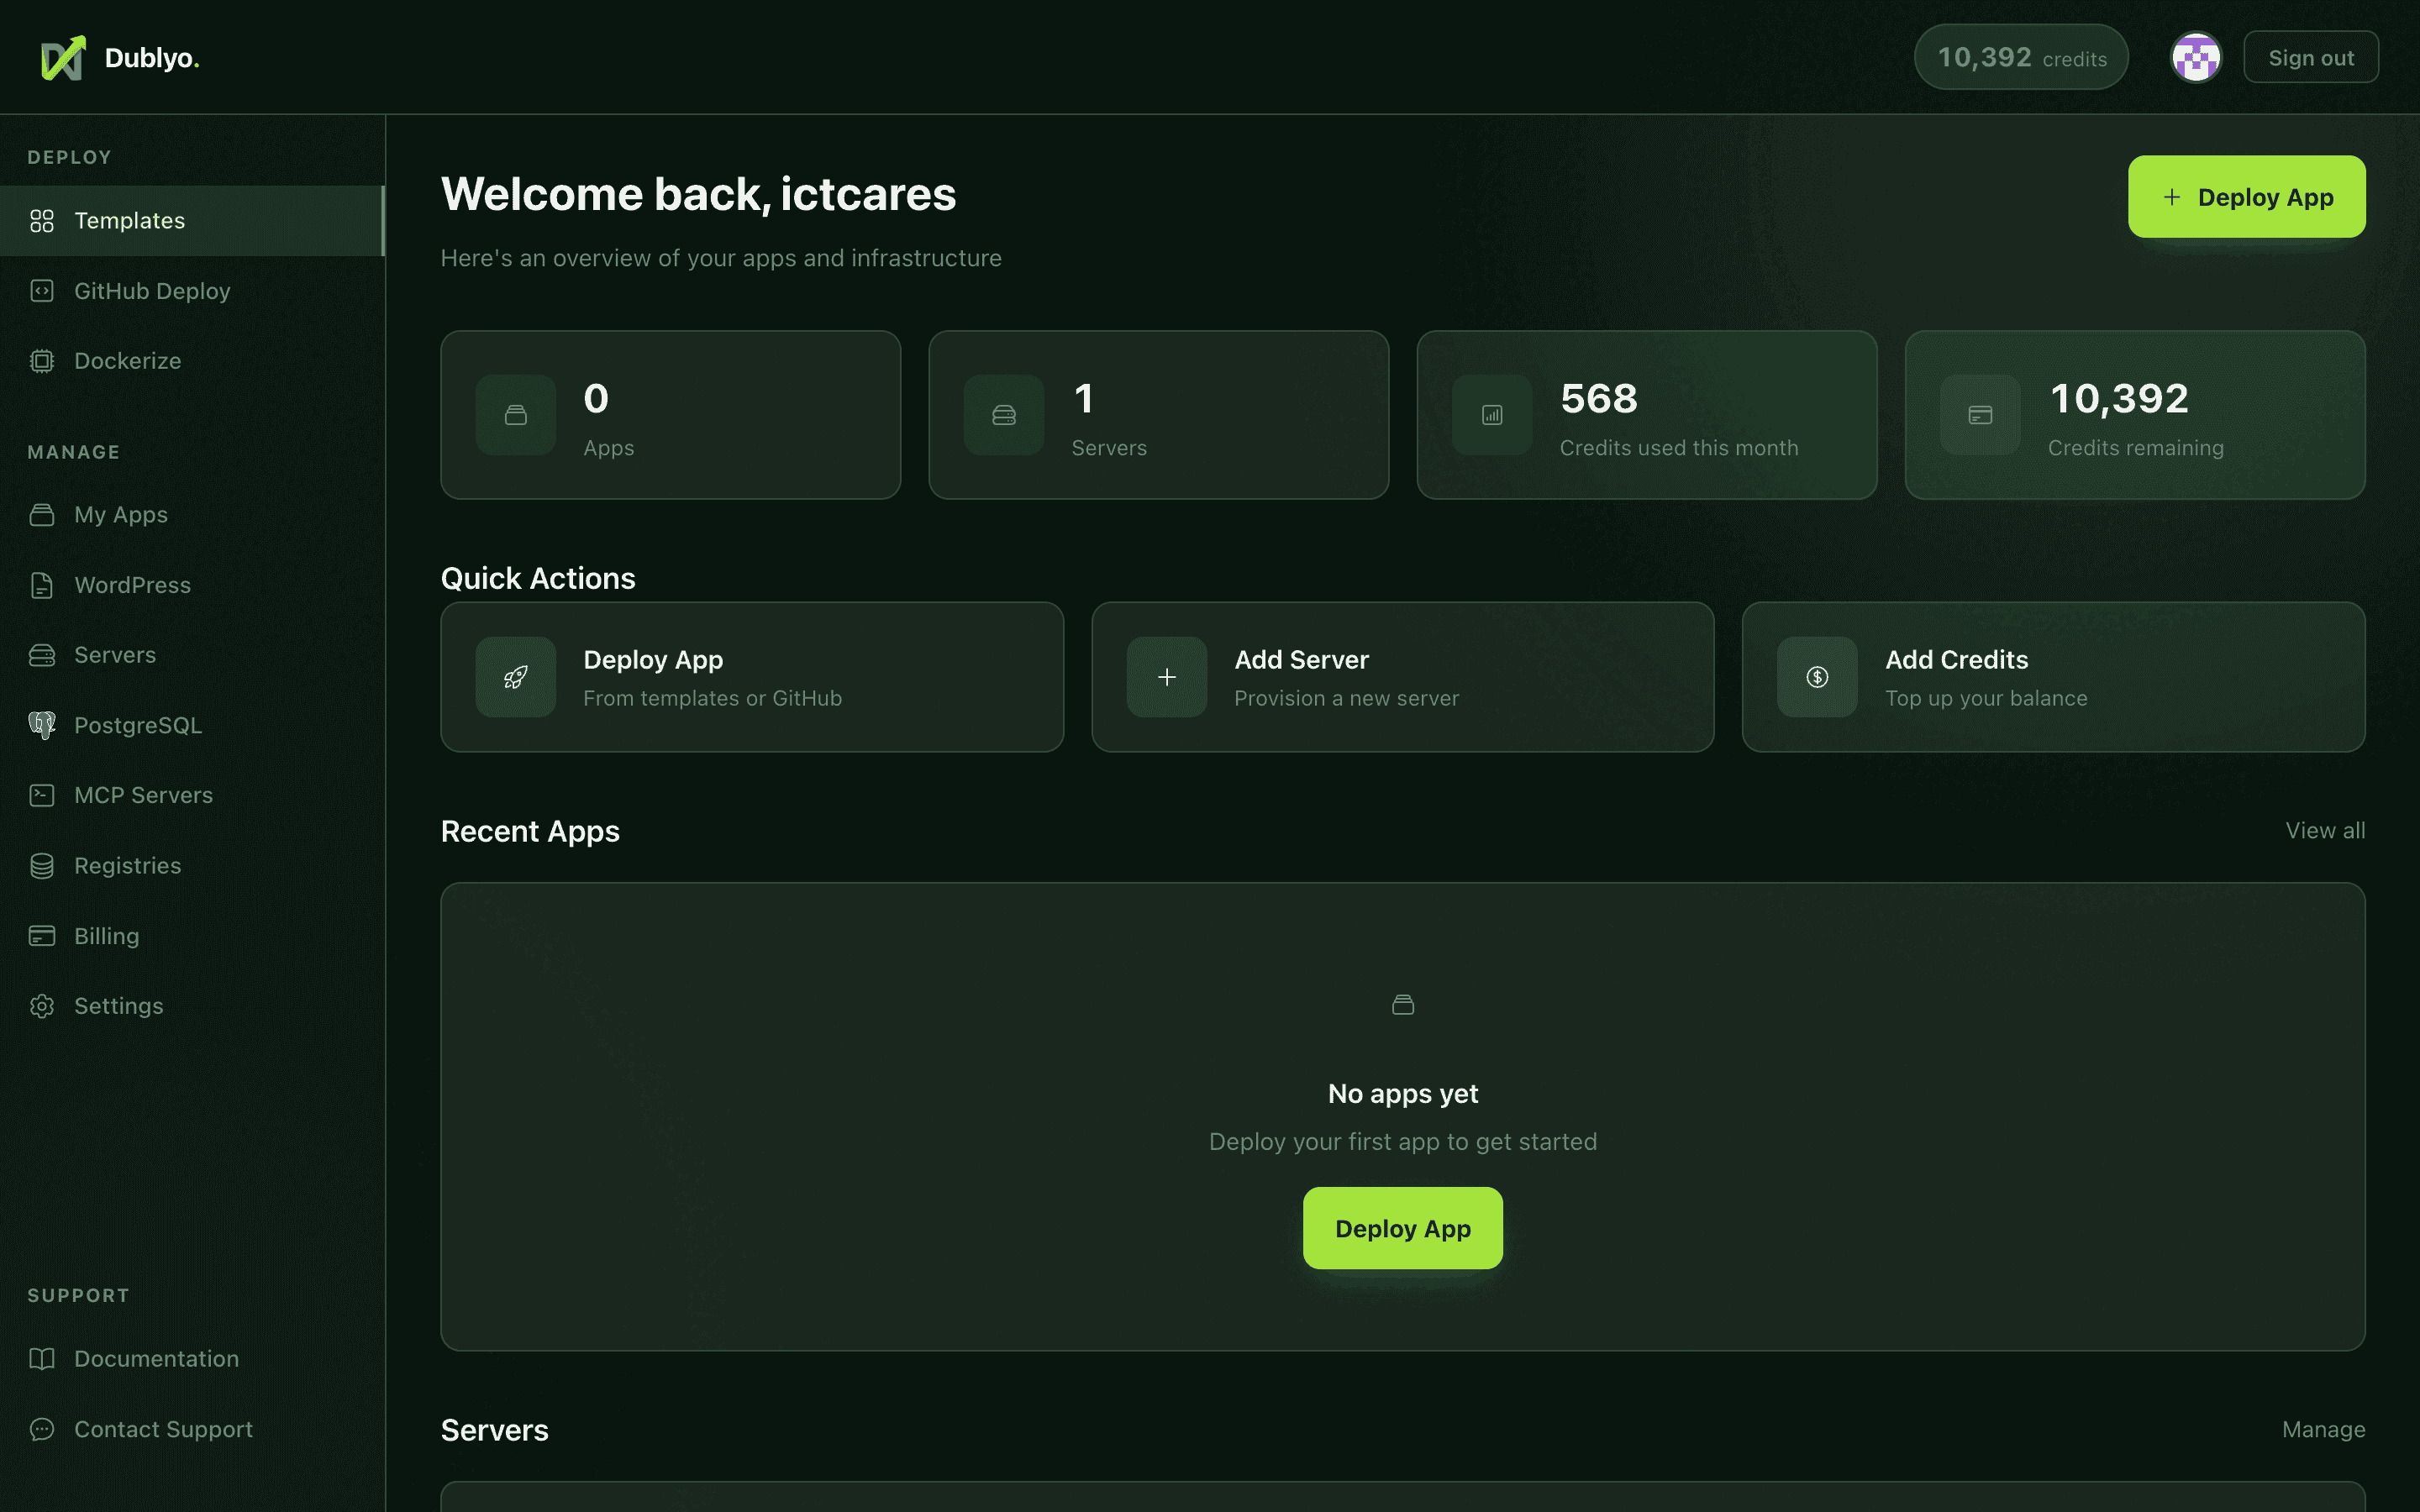 Your dashboard — the command center for all your servers and apps
Step 2: Add Credits
Dublyo uses a simple credit system: $1 = 100 credits. Credits are used to pay for server time, billed hourly. There are no hidden fees or per-app charges.
 Top up credits via PayPal — see your balance and usage at a glance
How Billing Works
- Credits are deducted hourly based on your running servers
- A Starter server costs roughly ~500 credits/month (~$5)
- You can run multiple apps on the same server at no extra cost
- Stop a server anytime to stop being charged
Top-up Options
| Amount | Credits | Bonus |
|---|---|---|
| $5 | 500 | — |
| $10 | 1,000 | — |
| $50 | 5,000 | +250 bonus |
| $100 | 10,000 | +750 bonus |
Step 3: Create Your First Server
Servers are the machines that run your apps. Unlike shared-container platforms, you get a dedicated cloud server with guaranteed resources.
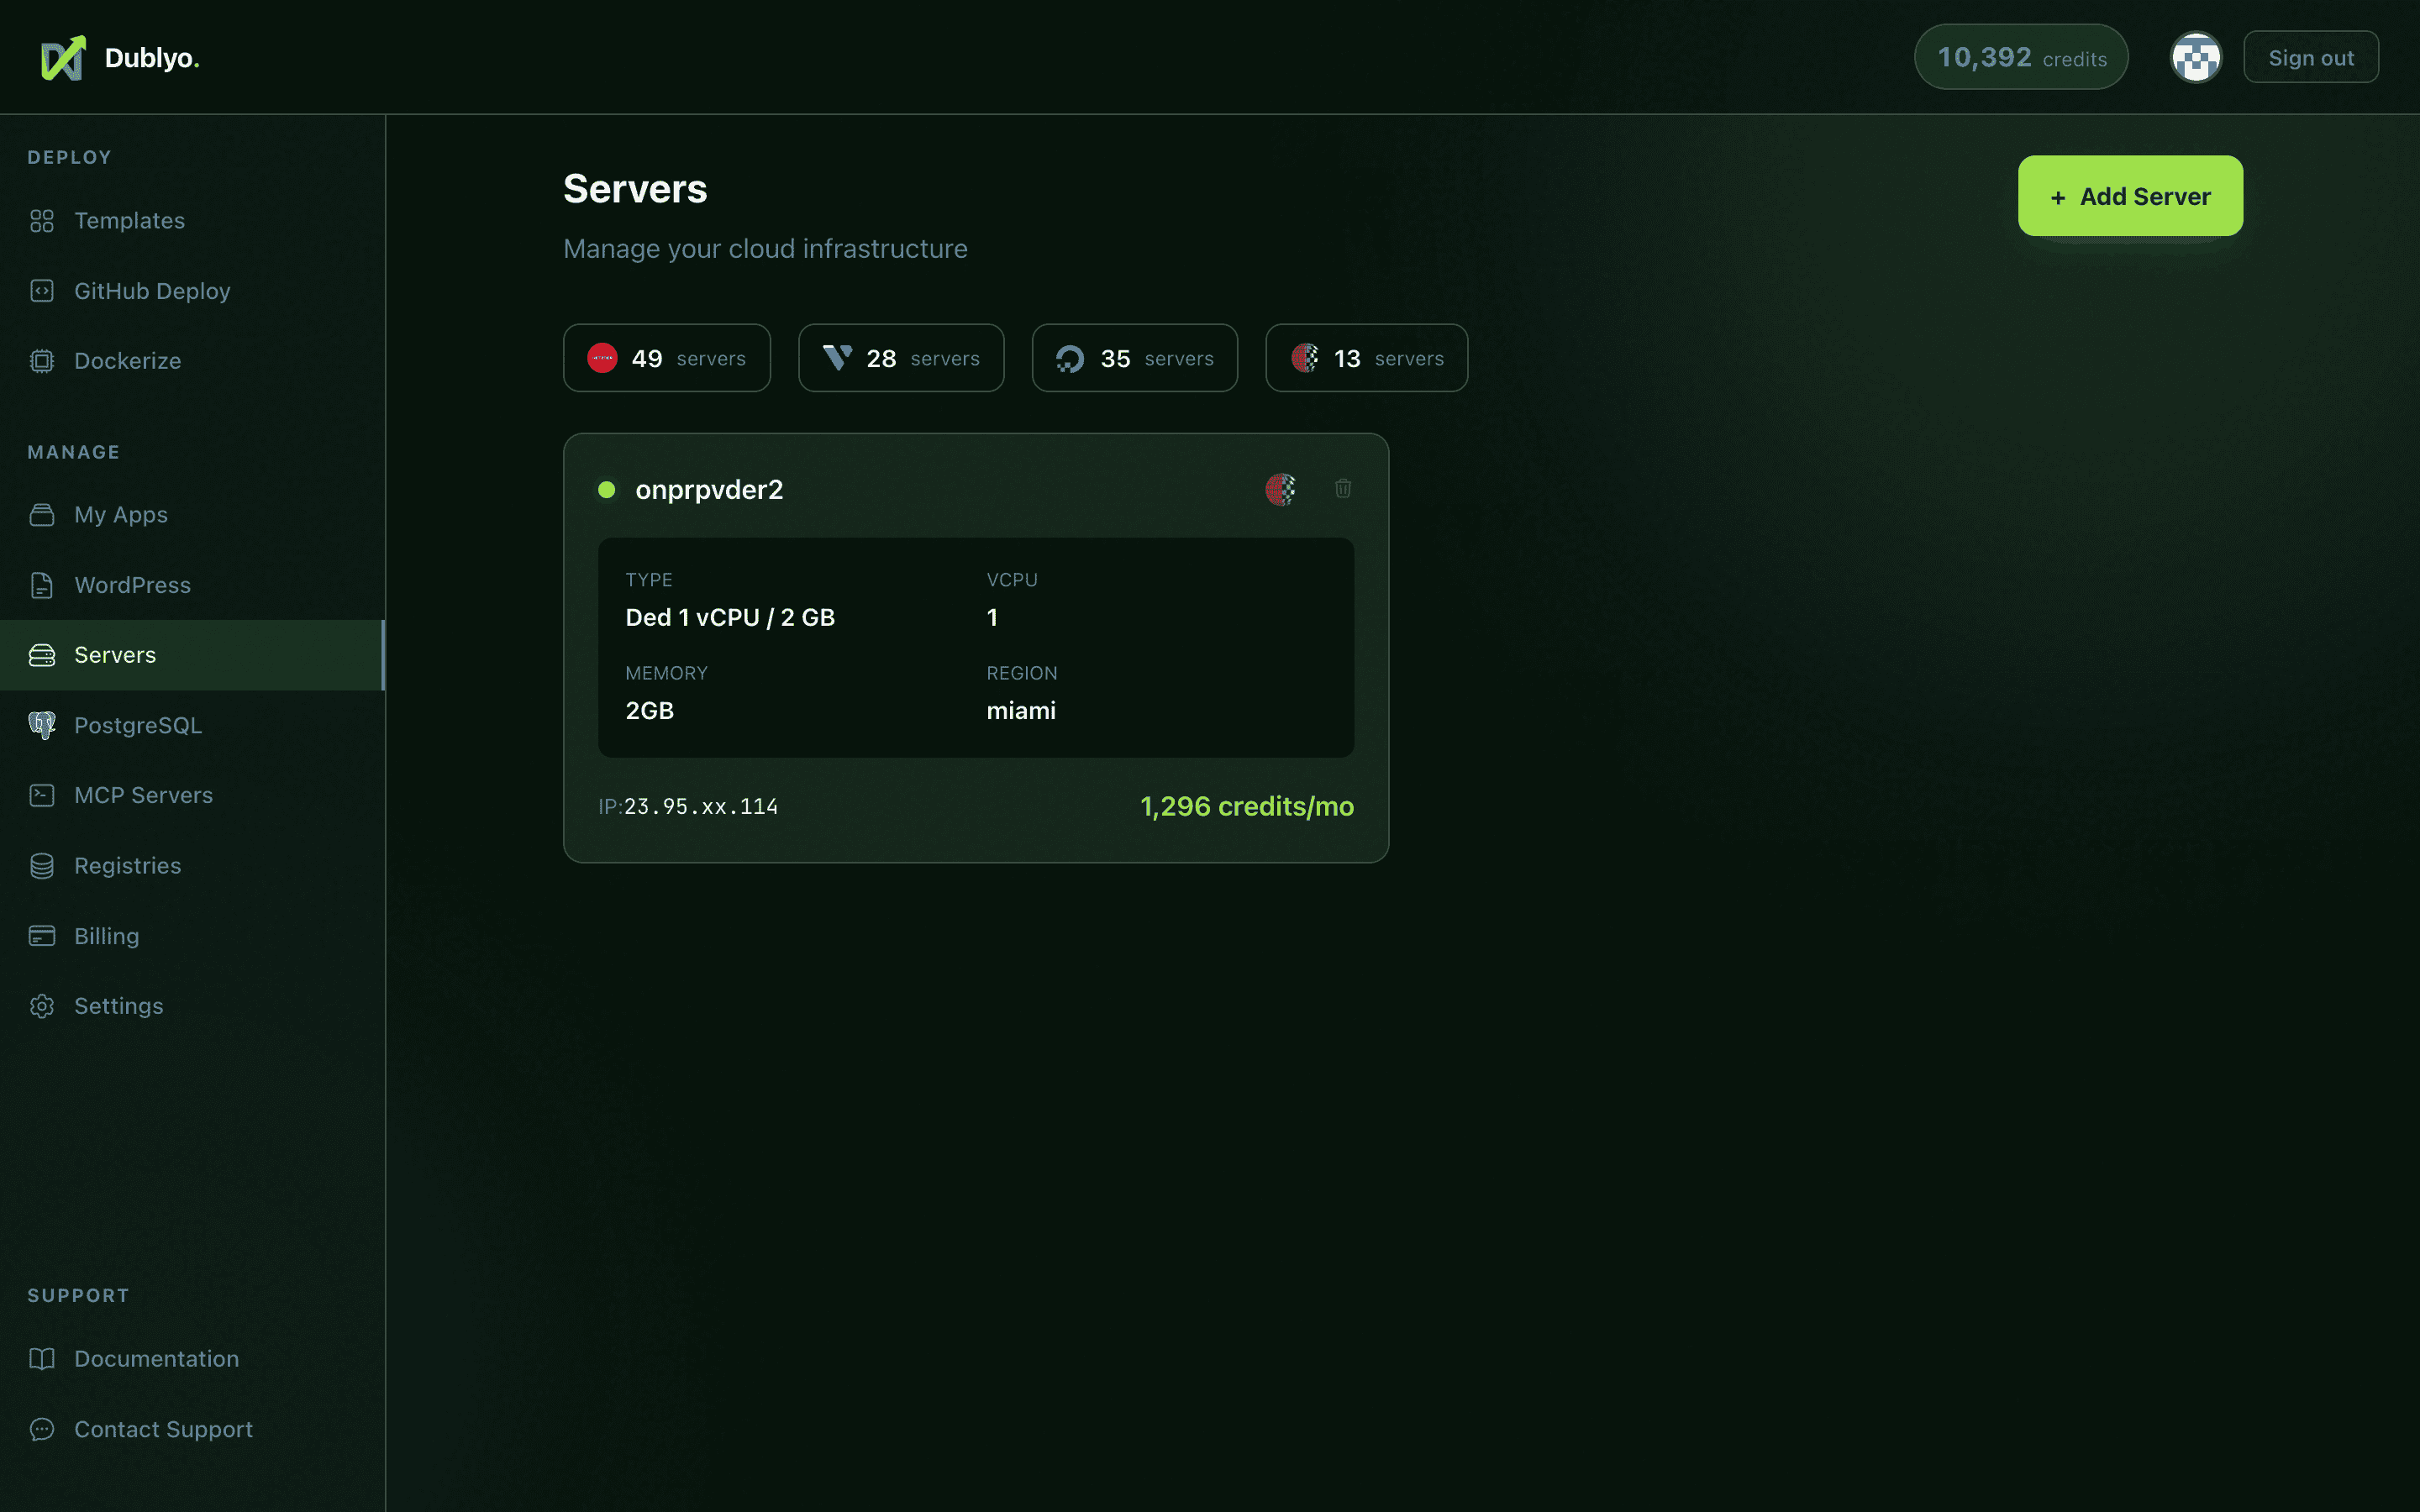 The servers page — create and manage your cloud infrastructure
How to Create
- Go to Servers in the sidebar
- Click "+ Add Server"
- Choose a provider — Hetzner Cloud is recommended for best value
- Pick a region closest to your users
- Select a server type
- Give it a name and click Create
Which Server Type?
| Type | RAM | CPU | Best For | Cost |
|---|---|---|---|---|
| Starter | 4 GB | 2 vCPU | 1–2 apps | ~500 cr/mo |
| Standard | 8 GB | 4 vCPU | 3–5 apps | ~860 cr/mo |
| Performance | 16 GB | 8 vCPU | 5–10 apps | ~1,560 cr/mo |
Provisioning takes about 2–4 minutes. Dublyo automatically installs Docker, sets up SSL via Traefik, and connects the server to your dashboard. You'll see a live progress bar and get notified when it's ready.
Step 4: Deploy Your First App
Once your server is running, you can deploy apps. The easiest way is to use a template — pre-configured apps ready to deploy in one click.
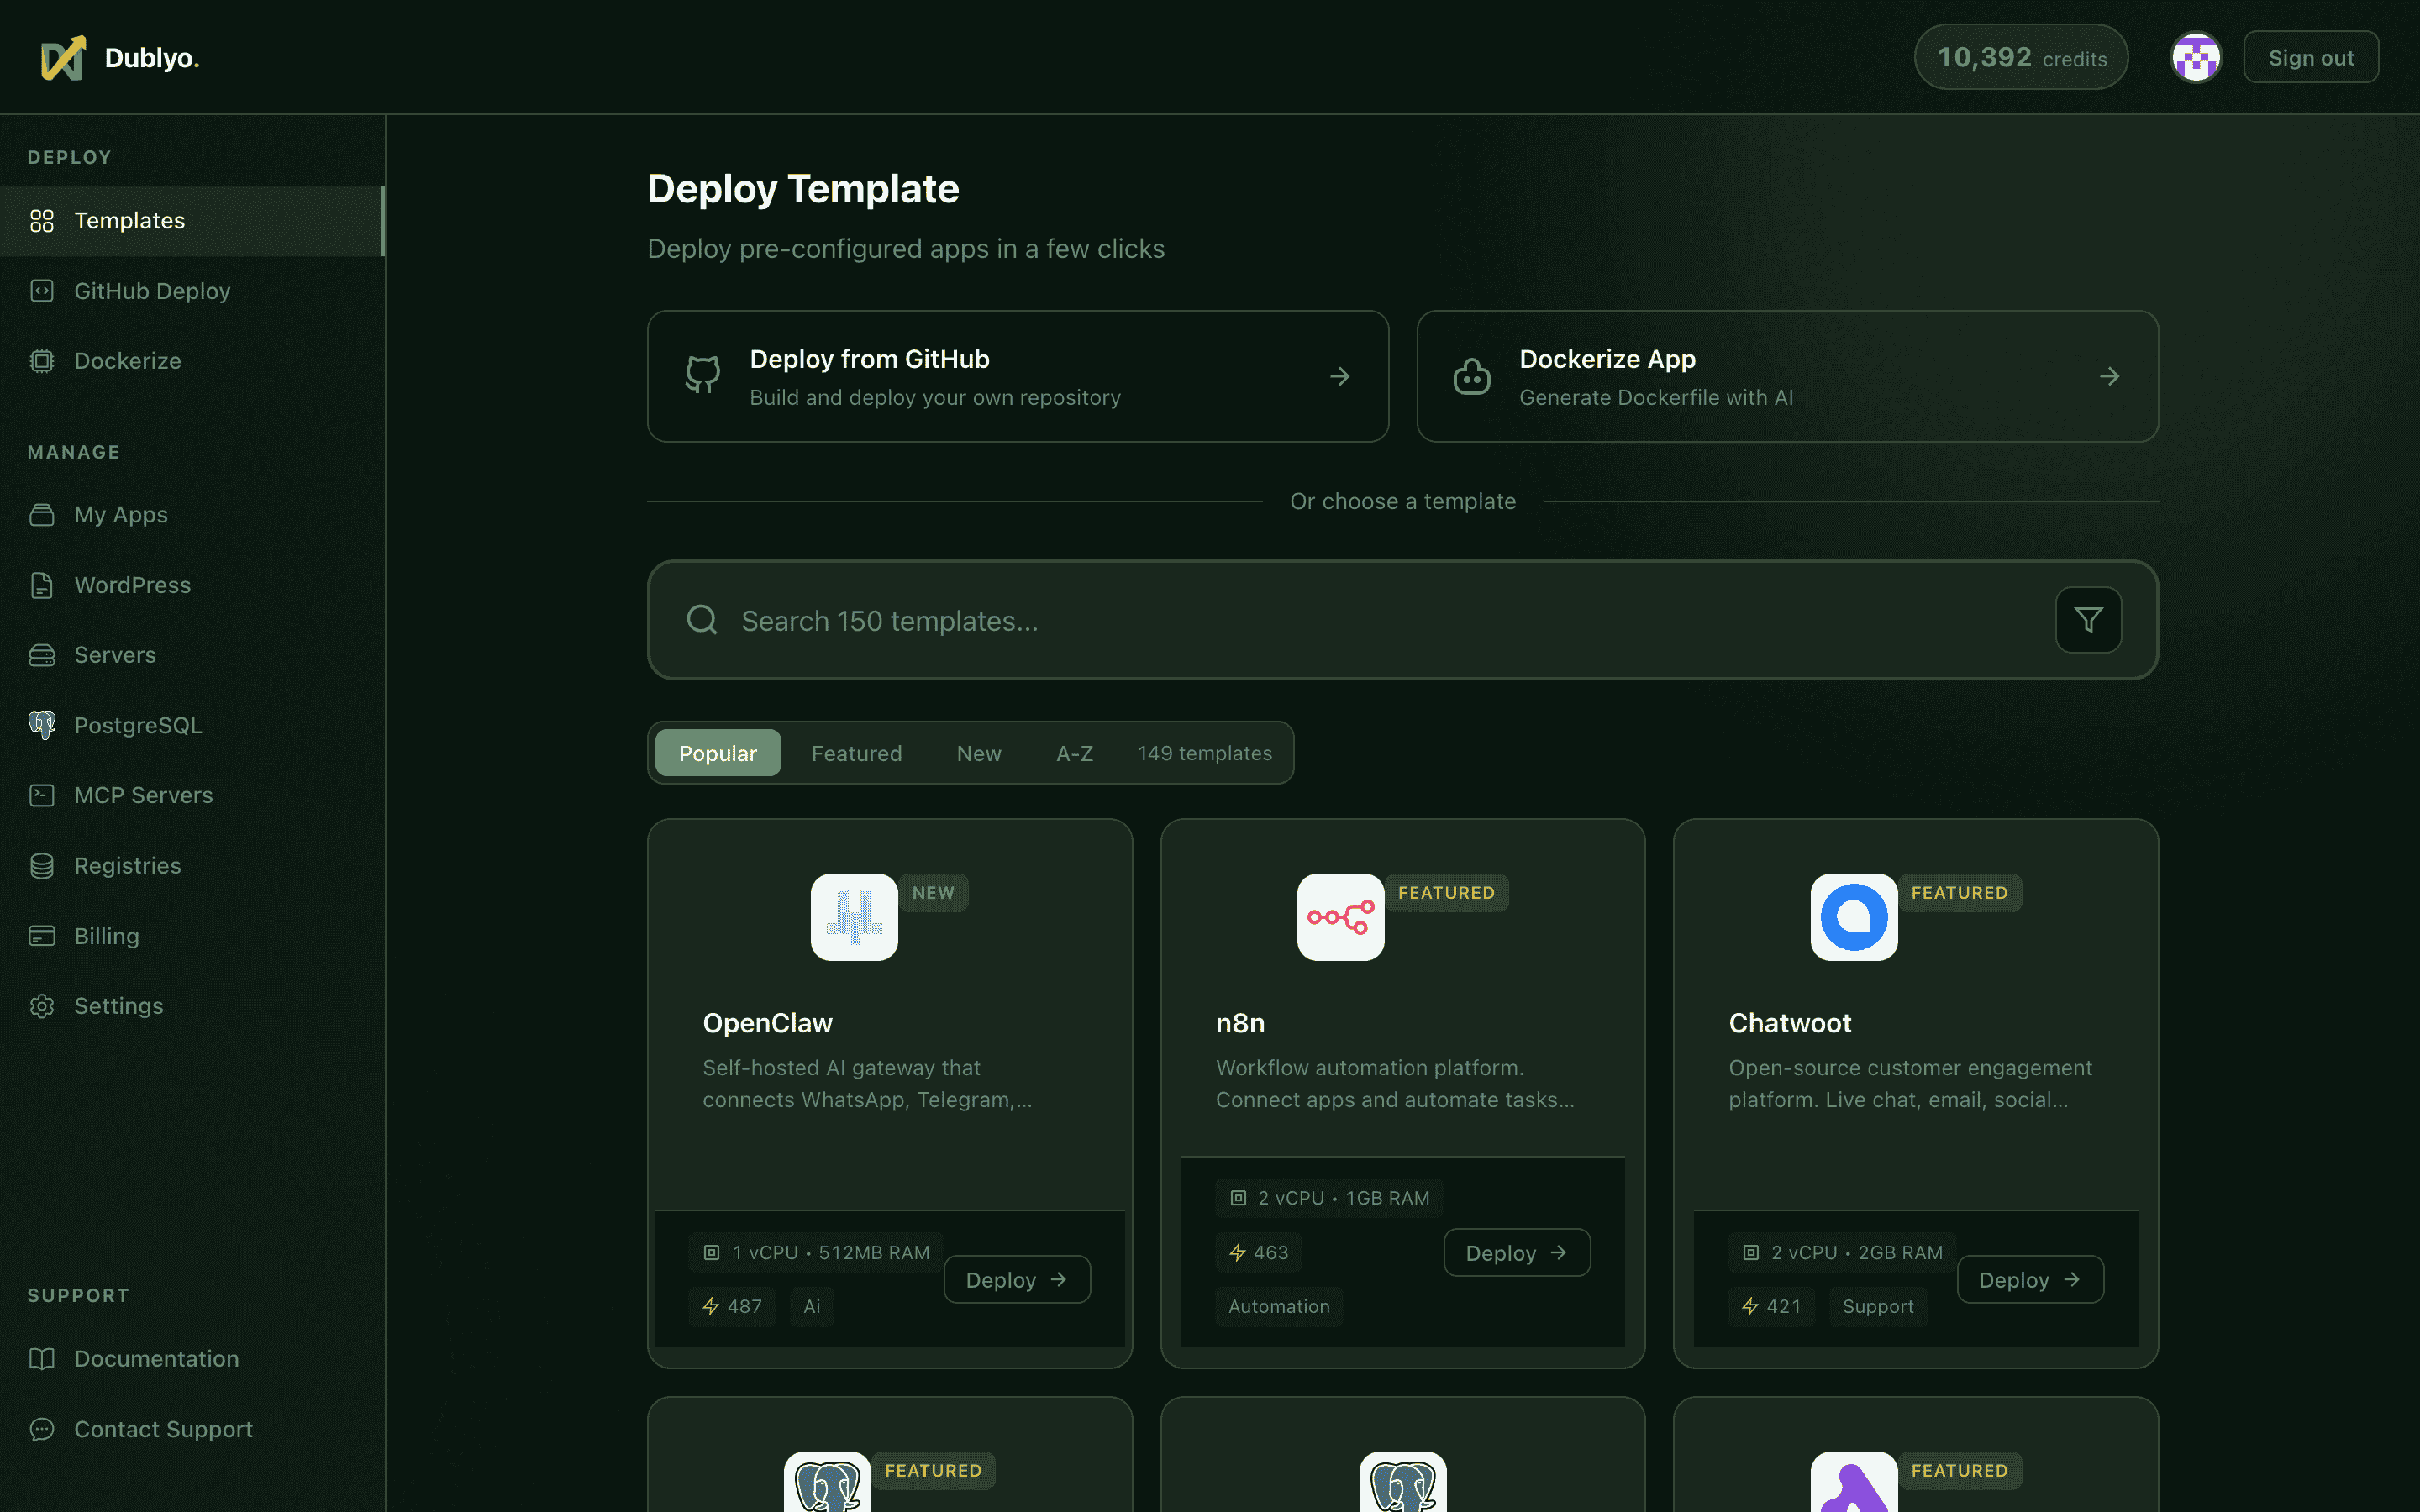 Browse 100+ templates — databases, CMS, AI tools, and more
Deploy from a Template
- Go to Deploy in the sidebar
- Browse or search for an app (e.g., "WordPress", "n8n", "PostgreSQL")
- Click a template to see its details
- Fill in any required settings (admin passwords, emails, etc.)
- Select which server to deploy to
- Click Deploy
Popular Templates
Deploy from GitHub
You can also deploy directly from a GitHub repository. Dublyo auto-detects your framework and builds it — no Dockerfile required.
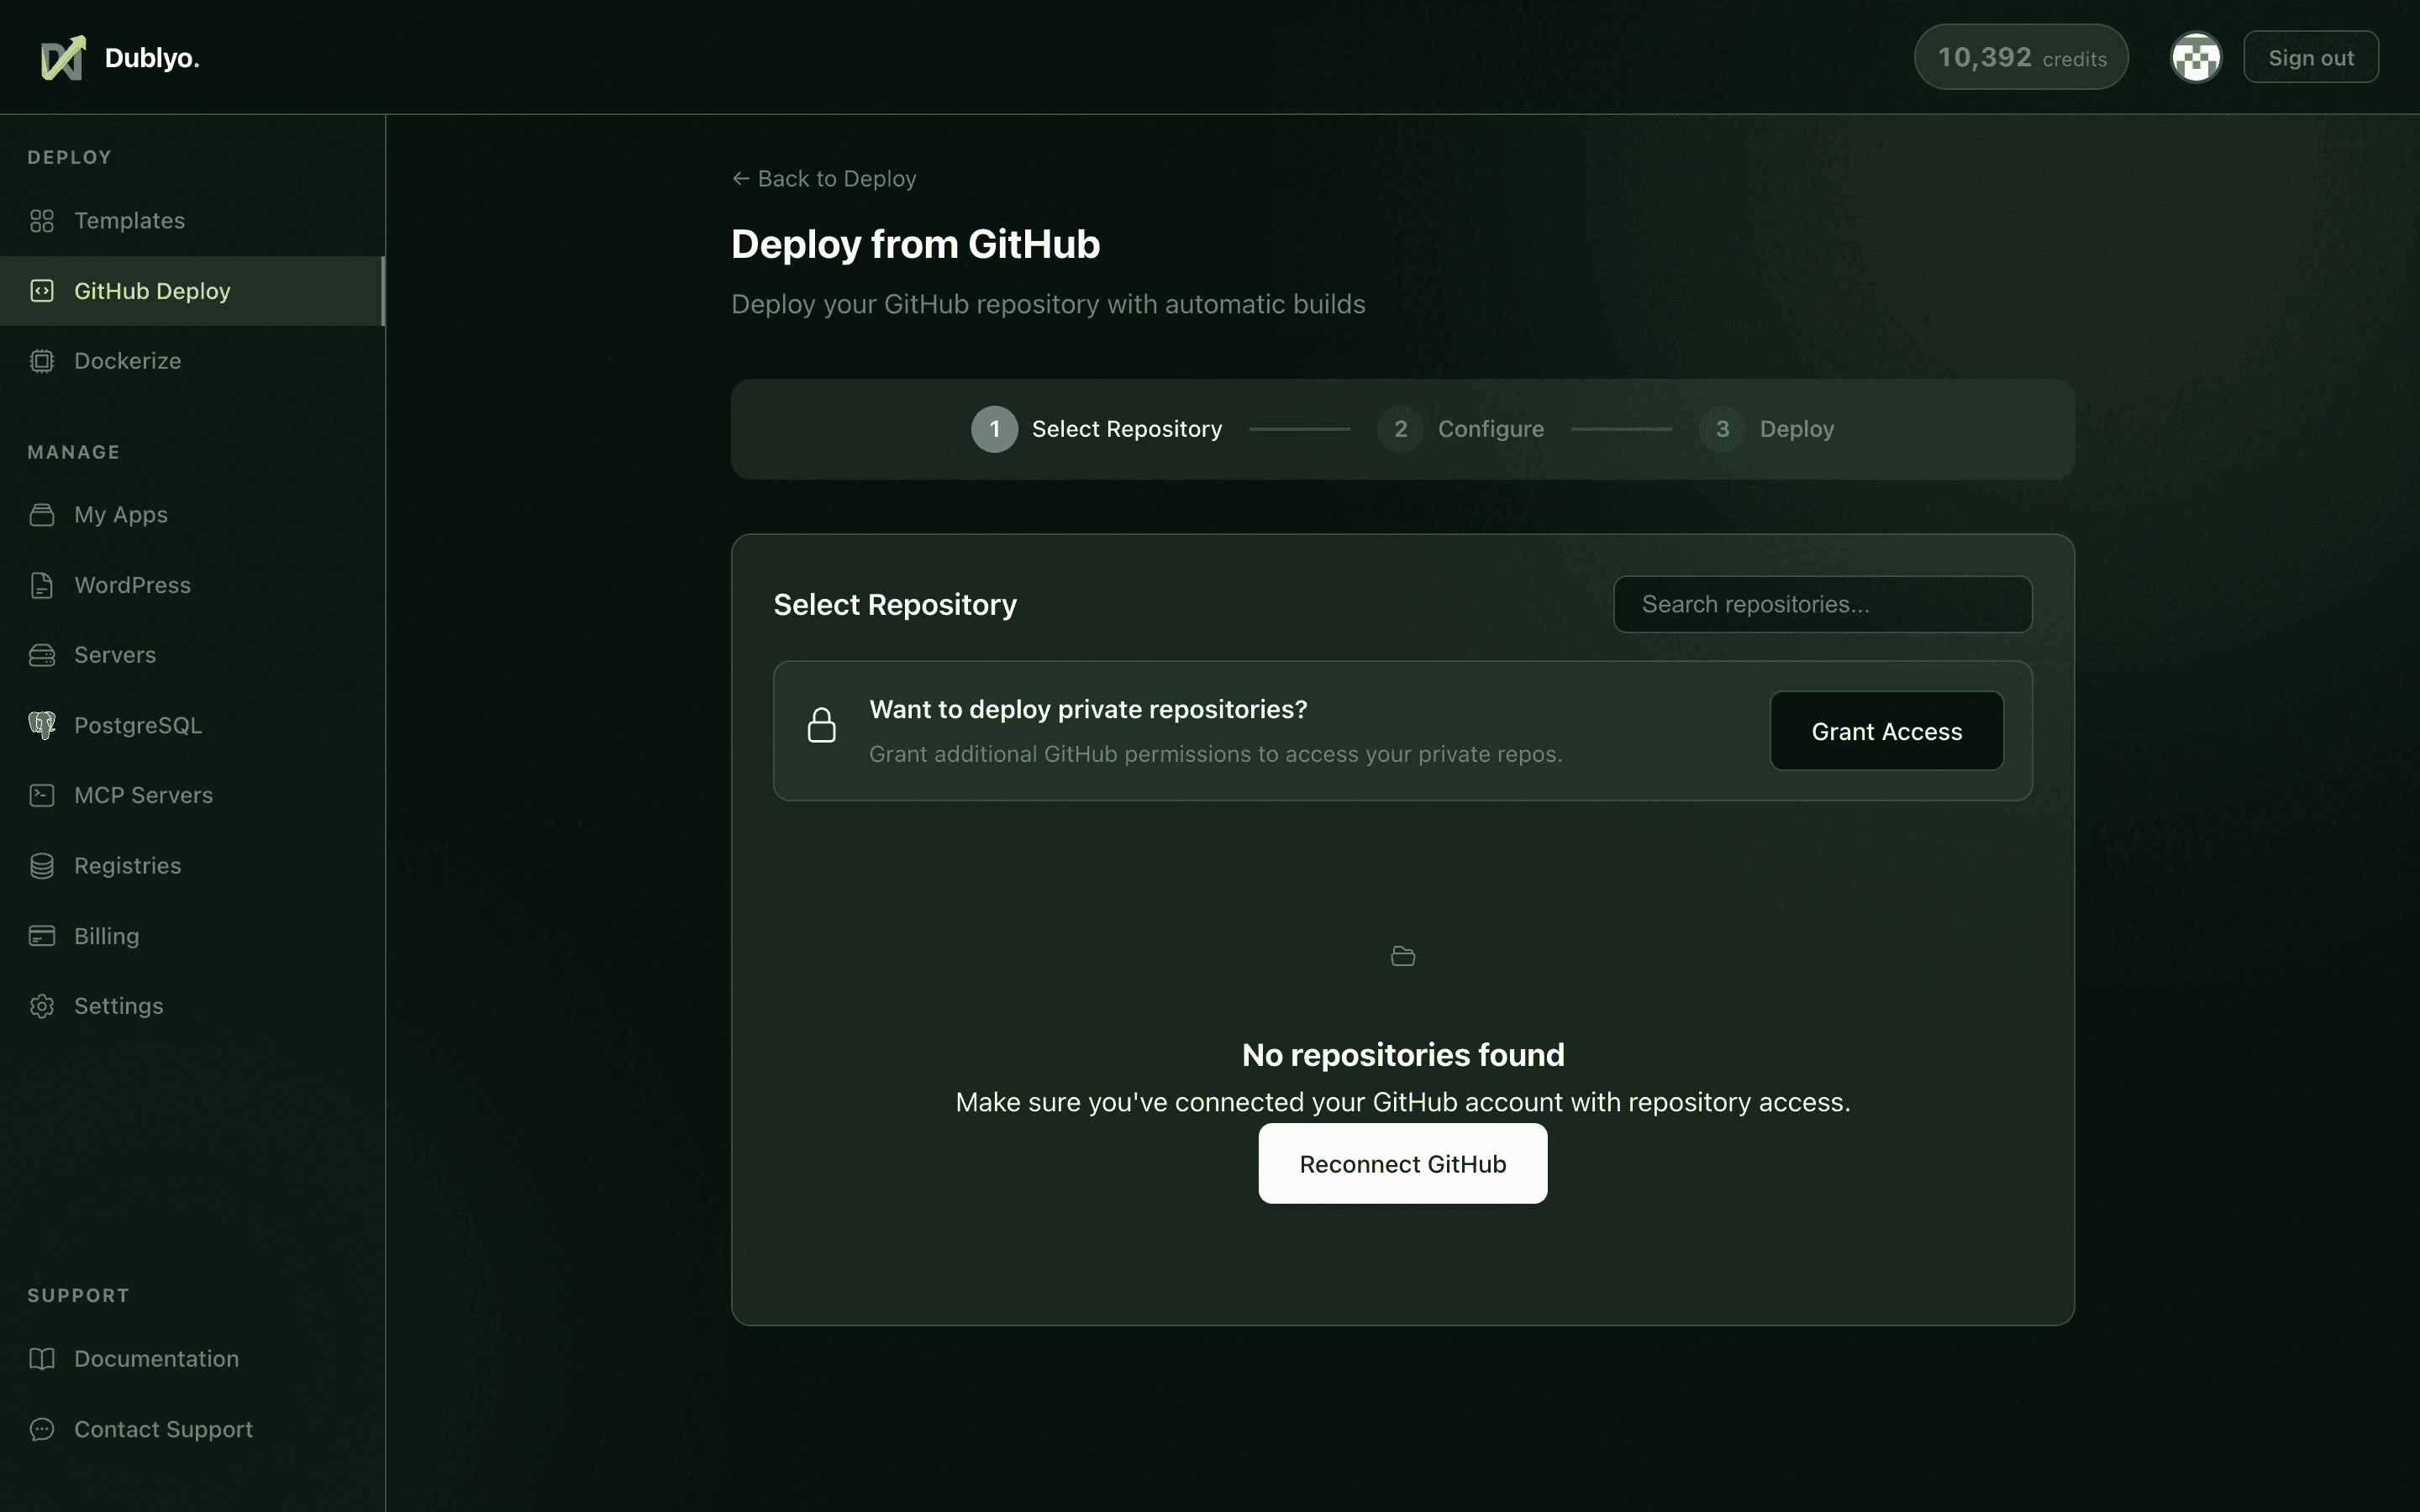 Connect your GitHub repo and deploy in one click
- Go to GitHub Deploy in the sidebar
- Connect your GitHub account (first time only)
- Select a repository
- Dublyo detects your project and builds it automatically
- Configure environment variables if needed
- Click Deploy
Step 5: Access Your App
After deployment, your app is live within seconds. Every app gets a free subdomain with automatic HTTPS.
Your App URL
Each deployed app gets a unique .dublyo.co subdomain, for example:
https://my-wordpress-abc123.dublyo.coThis URL is live immediately — share it, test it, or use it in production.
Custom Domains
You can add your own domain from the app detail page. Point your domain's DNS to Dublyo and SSL is configured automatically via Let's Encrypt.
Managing Your Apps
- View logs — real-time container logs from the app detail page
- Restart — restart your app with one click
- Environment variables — update config without redeploying
- Delete — remove an app when you no longer need it
What's Next?
You're up and running! Here are some things you can do next:
Deploy more apps
Run multiple apps on the same server — databases, backends, frontends, all managed from one dashboard.
Add a custom domain
Point your domain to Dublyo for a professional URL with automatic SSL.
Set up a subscription
Choose a monthly plan for automatic credit top-ups and higher server limits.
Explore all templates
Browse 100+ pre-configured apps across databases, CMS, AI tools, monitoring, and more.
Need Help?
Can't find what you're looking for? Check the full documentation or reach out.